Sunday, July 7, 2013

Lesson Plan- Berries and Pollination

Nature School
August 29th, 2011

Welcome song

Letter of the Day- B. For berries, birds, beautiful, bee, buzz,

Today we are going to be learning about berries and pollination.

Pollination
Who remembers this word- Pollination?

What is pollination? Pollination is what happens when a flower turns into a seed, or a berry, or a fruit. The flower is beautiful and attractive and smells wonderful. Little insects come and get nectar from the flower. When they land on the flower, they get a little bit of pollen on them. Then they spread that pollen to the next flower they go to. That is exactly what the flower wants to have happen!!! Spreading pollen from one flower to the next is great!! Then the seed begins to grow.

We, humans, love to eat the seeds, berries, or fruit that come from the flowers of plants after they are pollinated. Do you want to see some seeds of some plants we eat? Can you guess what plant they come from?

Senses Walk
Use a bandana or scarf to blindfold your budding naturalists and then carefully guide them through the park on a hike. Encourage them to use their other senses to experience the trip. Guide them towards trees and have them touch the bark, leaves and branches. What do they feel like? Have them stand still and listen. What sounds can they identify? What do they smell? Now switch places and let your child guide you!

Nature Scavenger Hunt
Hand out papers and pens

Nature collection and berry picking
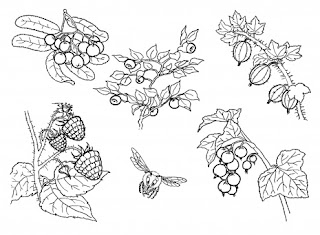
We are going to pick some berries while on our hike today. With those berries, we will make a special ink that pioneers used long ago. Blackberry juice was used to dye cloth navy blue and indigo.

So, i want you to collect some different things in your bag. Berries, of course! I also want you to look for natural materials that you can use as a paintbrush- leaves, grass, sticks, stems, dandelions and other flowers, evergreen twigs, etc. Be creative! Put them in your bag and we will use them when we are done with our hike.

Pioneer Craft:
Homemade Ink from Berries
True ink could be very expensive so many pioneers had to make their own. Inks were made at home from many different ingredients depending on what color was needed or wanted.

According to different sources, they used berries, powdered roots, nuts, and even chimney soot.

Ingredients:
1/2 cup of ripe berries (blueberries, cherries, blackberries, strawberries, elderberries, raspberries, etc.
1/2 teaspoon vinegar
1/2 teaspoon salt

Tools:
measuring cups and spoon
strainer
bowl
wooden spoon

Directions:
1. Fill the strainer with the berries and hold it over a bowl.
2. Using the rounded back of a wooden spoon, crush the berries against the strainer so that the berry juice strains into the bowl.
3. Keep adding berries until most of their juice has been strained out and only pulp remains.
4. Add the salt and vinegar to the berry juice. The vinegar helps the ink to retain its color and the salt keeps it from getting moldy.
5. If the berry ink is too thick, a tablespoon of water.

Craft:
Use the ink and the natural paintbrushes the children collected to paint a picture. Let the children incorporate natural materials into their picture using glue and scissors.

Lesson Plan- Ladybugs


Nature School
July 1st, 2013
Ladybugs

Welcome Song

Letter of the day

Ladybug fun facts:
1.   There are about 4,300 kinds of ladybugs in the world.
2.   Female ladybugs can eat as many as 75 aphids in one day!
3.   Ladybugs smell with their feet and antennae.
4.   A ladybug’s jaws chew side to side instead of up and down
     like our jaws.
5.   The color of a ladybug’s spots begin to fade as it gets older.
6.   Ladybugs are most active when their body temperature is 75 degrees    
     or warmer.
7.    A ladybug’s bright color warns birds that it does not taste good.
8.   When a ladybug flies, its wings beat 85 times every second.
9.   There are almost 400 different kinds of ladybugs in North America.
10. Female ladybugs are larger than male ladybugs.

Craft:
Cut and paste- Ladybug Life Cycle

Life Cycle:
Ladybugs aren’t so cute when they’re born—you may not even recognize them.
They hatch from eggs and look like tiny alligators. The new bug is called a larva, and it takes about 21 days for it to grow up to be a ladybug beetle.
Eggs
Mother ladybugs lay 10 to 15 eggs on the underside of a leaf. They look like tiny, elongated yellow jelly beans.
Larva
Larvae crawl out of their eggs and begin to look for food. Mother bugs make sure there are lots of aphids or mites nearby because the larvae will eat a lot of them before they become adults. Ladybug larvae look like tiny alligators—and they bite!
Bigger Larvae
After a few days, the little larvae begin to grow, and soon they shed their skins. This is called “molting,” and it happens several times. If you look closely you can see old skins clinging to leaves or to the grass in your ladybug jar.
Pupa
In about two weeks, the bigger larvae begin to look a little different, something like a lobster without legs and claws. They attach themselves to a leaf and hardly move at all. They are doing something extraordinary under their skins.

Imago or Adult
In another few days the ladybug splits its pupa and emerges looking very different. For the first few hours it’s pale and soft. Its shell quickly hardens. Its color becomes brighter. Now it looks just like its mother—a perfect adult ladybug beetle. What seems like amazing magic is one wonderful way the natural world works: ladybug metamorphosis.

How many of you have ever seen a real live ladybug? Did you pick it up? Were you afraid of it? Not very many people are afraid of ladybugs, are they? Ladybugs are kind of pretty, aren't they? When you see one it is hard not to want to pick it up and look at it a little closer. They kind of tickle when they walk on your arm, don't they?
Most people don’t mind having them around especially people who like to grow fruits and vegetables and flowers. They are glad to see them because they know that ladybugs are very helpful.
Along time ago the farmers in California had a big problem. Some very harmful insects, called the cottony-cushion scale, were eating and killing all their orange trees. They found out that the bug had been brought over from Australia by mistake on some ships. The insects weren’t so bad in Australia because Australia had ladybugs that ate the cottony-cushion scale. These farmers knew that they needed the Australian ladybugs to help them save their trees. So 500 ladybugs were sent to California. When they arrived they started eating the cottony-cushion scale and within two years the trees were saved. Yes, those ladybugs were very helpful. The trees were no longer dying.


Games:
Ladybug matching game

Ladybug fly through my window

Ladybug, Ladybug
Written by Nancy Foss
Ladybug, Ladybug turn around. (Have the children turn around.)
Ladybug, Ladybug touch the ground. (Have the children touch the ground.)
Ladybug, Ladybug show your love. (Use the sign language sign for "I love you.")
Ladybug, Ladybug point to heaven above. (Point up.)
Ladybug, Ladybug stomp your feet. (Stomp your feet.)
Ladybug, Ladybug take a seat. (Children all sit down.)
A Teeny, Tiny Ladybug
Written by Nancy Foss
(Sing to the tune of "Itsy, Bitsy Spider)
A teeny, tiny ladybug crawled up my arm this way. (Walk your fingers up your arm.)
Giggle, giggle, giggle this is what I say. (Hold your belly and laugh.)
Along came the wind and blew my friend away. (Blow wind with mouth and wave your arms.)
Out came the sun and my friend is here to stay. (Make sun with your arms.)
With a giggle, giggle, giggle we'll have fun today. (Hold your belly and laugh.)